Fabscan Pi project – 3D scanning for all
By Russell Barnes. Posted

Mario Lukas builds 3D scanners from the Raspberry Pi and off-the-shelf components. He tells Lucy Hattersley how it’s done
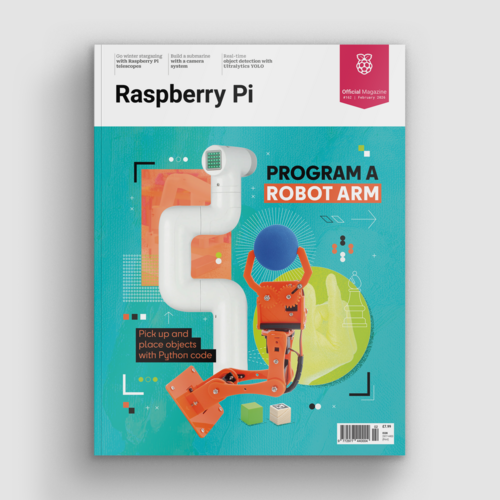
Program a robot arm, with Raspberry Pi and Python code
The full article can be found in The MagPi 38
Few things in modern life are more fun than 3D-scanning an object, then using a 3D printer to create a copy. But 3D scanners are still very expensive to buy. FabScan is an open-source, DIY 3D laser scanner being developed by René Bohne and Mario Lukas.
Initially, FabScan was connected to an external computer, but Mario and René have recently created a Raspberry Pi version that houses all the components required inside a single box. This Raspberry Pi-powered edition means you can build a complete 3D scanner for under $100 (£65).
The FabScan project has a long history. It started out as a Bachelor’s thesis by Francis Engelman at RWTH University in Aachen (Germany) in 2011. In 2014, development was taken over by Mario and René.

“The FabScan without the Raspberry Pi is an open-source, do-it-yourself 3D laser scanner,” says Mario. “After a few months I realised that people had problems [getting] the FabScan software working on all the different operating systems and hardware setups.
“The FabScan uses a laser cut plywood case,” continues Mario. There is a stepper motor connected to a turntable in the middle.” Inside the case is a 5mW red laser and Logitech Lc270 webcam. The laser and a webcam are mounted in the front of the case. An Arduino with a FabScan shield controls the stepper motor and laser.
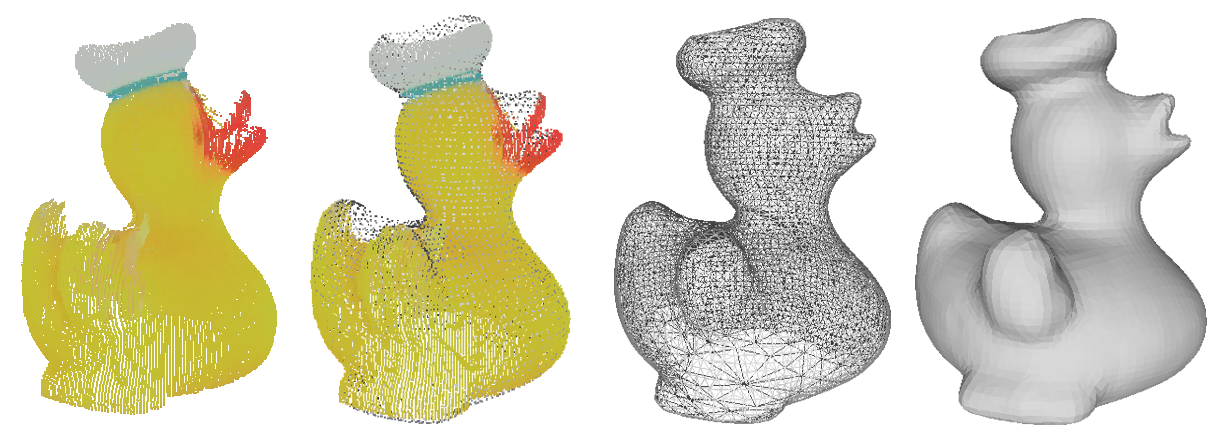
You place an object on the turntable so the laser runs across its surface. As the turntable rotates, the webcam monitors the movement of the laser and creates a point cloud of data. The data is turned into a 3D mesh, and this file can be exported and used in 3D software.
“Since I introduced the Raspberry Pi to the FabScan project, the webcam [has been] replaced by the Pi Camera Module,” Mario tells us. “We are developing a FabScan Pi HAT to replace the Arduino and the FabScan Shield as well.”
You can build a FabScan case yourself using sheets of wood, and a complete bill of materials can be found on the project's current website. Alternatively, a FabScan Cube Kit v2 + Electronics bundle can also be ordered from German-based distributor Watterott for €105 (£77).
“Anybody who wants to build a FabScan Pi should order the parts and build it,” insists Mario. “We are trying to keep the things as simple as possible, and introducing the Raspberry Pi to the FabScan project was a good approach to improve the usability.
“Most of the work was to write new software for the FabScan,” continues Mario. “The software provides a JavaScript-based web-enabled user interface for scanning. The user can call the local FabScan in a browser and the user interface will show up.
“During the software developing process, I scanned a lot of different rubber ducks, other plastic animals, figures made of gypsum (plaster of Paris), and stuff lying around in my workroom.
“After a scan, you will get a one-to-one sized three-dimensional model of the scanned object,” explains Mario. “The current FabScan Pi software can export the model in [the] STL file format that is mostly used by 3D printers.”
Pushing forward with the FabScan project is a challenge, but Mario and René remain unperturbed.
“At the moment, the FabScan project is spread all over the web,” explains Mario. “In the upcoming weeks, I will try to create a website where all corresponding threads run together.

Russell runs Raspberry Pi Press, which includes The MagPi, Hello World, HackSpace magazine, and book projects. He’s a massive sci-fi bore.
Subscribe to Raspberry Pi Official Magazine
Save up to 37% off the cover price and get a FREE Raspberry Pi Pico 2 W with a subscription to Raspberry Pi Official Magazine.
More articles

Kuensa portable music sequencer
We like the look of where this device is going.
Read more →
Cyberdeck
We can’t imagine the looks you’d get using this machine on your daily commute, but apparently the maker of this wonderful machine does just that.
Read more →
Programming station
Spot the microcontroller: we can see an Arduino Uno, Arduino Nano, a pair of ESP32 boards, and a Raspberry Pi Pico, all waiting to be played with.
Read more →