Badger 2040 review: a Raspberry Pi e-paper badge
By Lucy Hattersley. Posted
Raspberry Pi 2040 is the chip at the heart of Raspberry Pi Pico, and it’s making its way across the tech ecosystem, powering a range of unique devices.
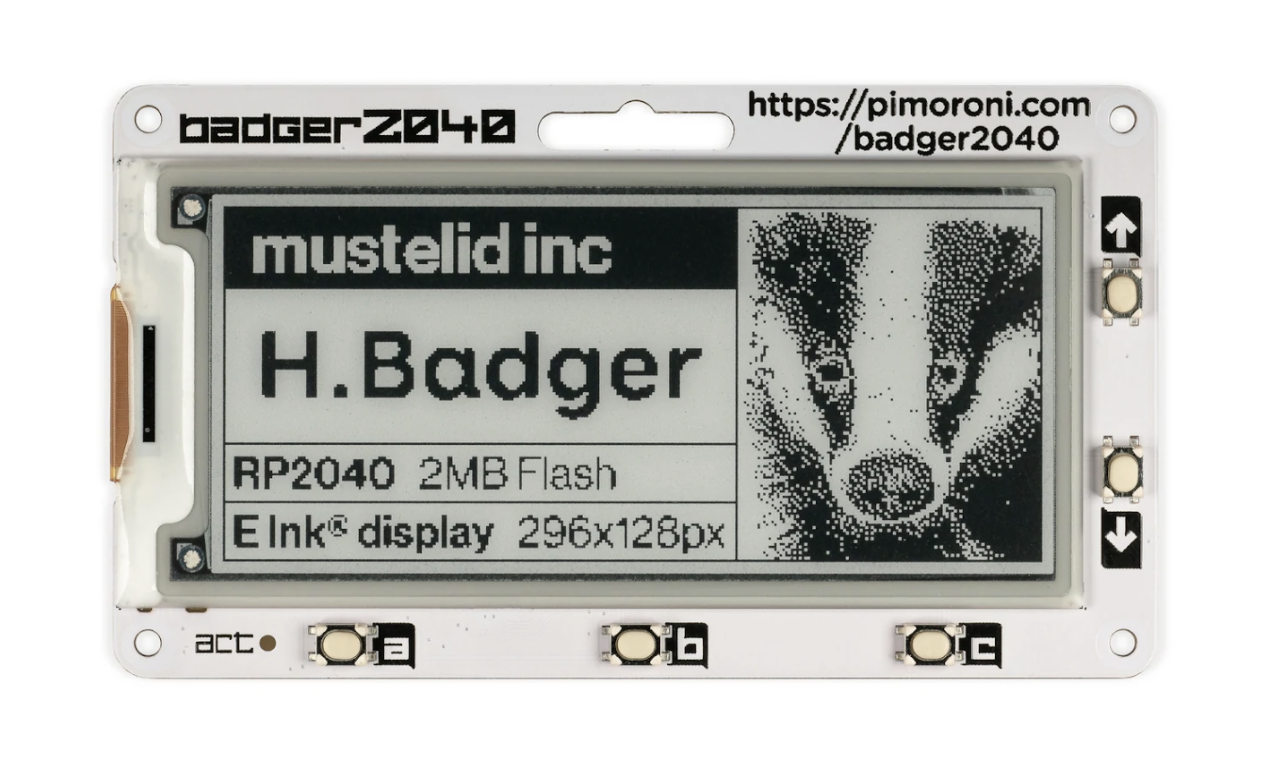
Badger 2040 (£12/$16) is an RP2040 mounted on a 2.9-inch black and white e-ink display with five buttons.
The device comes fully assembled, so all you need to do is turn it on and load up the latest version of the software from Pimoroni’s GitHub page. Installation is a case of holding down the BOOT button to mount RP2040 onto the destkop, and copying the UF2 file to the mounted storage.
There’s an app
There is a clock app, ebook app (pre-loaded with Wind in the Willows), an image app, interactive list app, badge app, along with a QR code, info, and help information displays.
As with many projects, the fun begins when you start exploring what you can do with Badger 2040 in a coding environment. Pimoroni’s documentation is, as typical, excellent, including a Getting Started with Badger 2040 guide. The tutorials take you through writing ‘Hello Badger’ to the screen and customising the default apps. This is done by exploring a range of text files in Thonny (using View > Files). Images can be converted using Pillow and the convert.py file
An optional accessory kit includes a AAA battery holder and batteries, Velcro square, lanyard, and cable. You can also power Badger 2040 by connecting a lithium battery to the JST-PH connector.
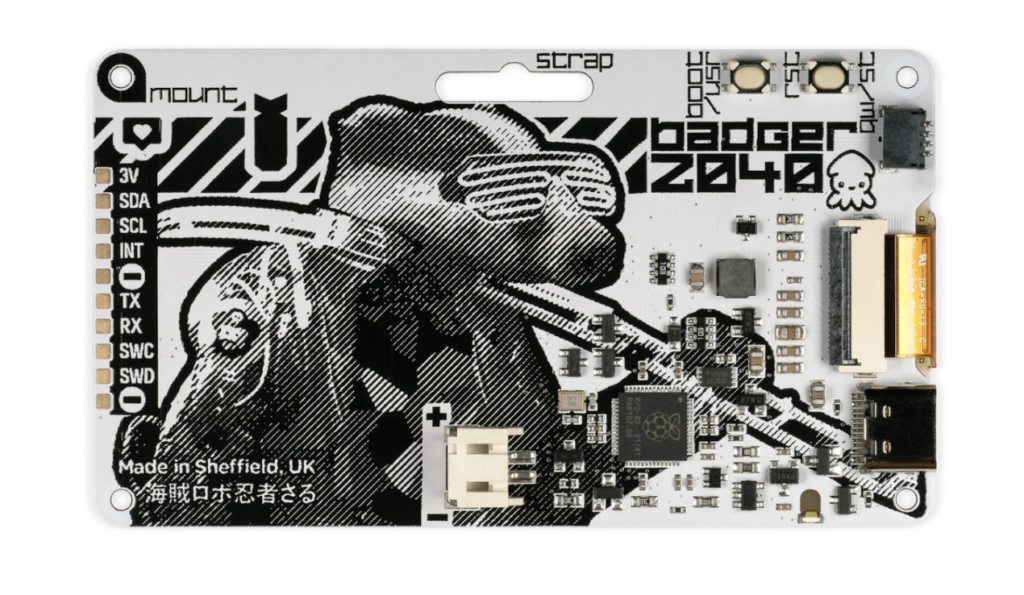
Moving on from the default Badger OS and test projects, Badger 2040 has a Qwiic/STEMMA QT port for connecting breakouts with a JST‑SH cable and STEMMA QT adapter. With this, you can explore integration with a variety of sensors, breakout boards, and accessories.
Verdict
8/10
Badger 2040 is a fun accessory that integrates nicely with Raspberry Pi thanks to its RP2040 base. Simple to set up, but a lot of potential for integration with your projects.
SPECS
Screen: 2.9-inch black and white e-ink display (296 × 128 pixels)
Processor: RP2040 (dual Arm Cortex-M0+ running at up to 133MHz with 264kB of SRAM); 2MB of QSPI flash supporting XiP
I/O: Five front user buttons; Reset and boot buttons; White LED USB-C connector for power and programming; JST-PH connector for attaching a battery (input range 2.7 V – 6 V)

Lucy is Editor of Raspberry Pi Official Magazine.
Subscribe to Raspberry Pi Official Magazine
Save up to 37% off the cover price and get a FREE Raspberry Pi Pico 2 W with a subscription to Raspberry Pi Official Magazine.
More articles

Vintage Radio Plex Server
There’s an antenna sticking up on this build, but it’s just for show
Read more →
Cyber Pet Tumbler
This virtual pet can be thrown around its plastic case. Rob Zwetsloot tries to keep it alive
Read more →
Kiwi+ USB review
An upgraded Kiwi KVM brings USB device sharing between machines. Rob Zwetsloot makes the switch
Read more →