Explore the power of amplitude modulation
By Russell Barnes. Posted
Learn how to master Sonic Pi’s powerful slicing capabilities with its creator, Sam Aaron….
A quick into to Python – short scripts, rapid results
This month, we take a deep dive into one of Sonic Pi’s most powerful and flexible audio FX – the :slicer. First, listen to the deep growl of this code, which triggers the :prophet synth:
synth :prophet, note: :e1, release: 8, cutoff: 70
synth :prophet, note: :e1 + 4, release: 8, cutoff: 80
Now, let’s pipe it through the :slicer FX:
with_fx :slicer do
 synth :prophet, note: :e1, release: 8, cutoff: 70
 synth :prophet, note: :e1 + 4, release: 8, cutoff: 80
end
Hear how the :slicer acts like it’s muting and unmuting the audio with a regular beat. It also affects all the audio generated between the do/end blocks. You can control the speed which it turns the audio on and off with the phase: (phase duration) opt. Its default value is 0.25, which means 4 times a second at the default BPM of 60. Let’s make it faster:
with_fx :slicer, phase: 0.125 do
 synth :prophet, note: :e1, release: 8, cutoff: 70
 synth :prophet, note: :e1 + 4, release: 8, cutoff: 80
end
Now, have a play with different phase: durations. Good values to try are 0.125, 0.25, 0.5, and 1. Fig 1 below shows how different phase: values alter the number of amplitude changes per beat.

By default, the :slicer FX uses a square wave to manipulate the amplitude through time. Other control waves supported by :slicer are saw, triangle, and (co)sine – see Fig 2 below. The following code uses (co)sine as the control wave. Hear how the sound doesn’t turn on/off abruptly, but instead smoothly fades in/out:
with_fx :slicer, phase: 0.5, wave: 3 do
 synth :dsaw, note: :e3, release: 8, cutoff: 120
 synth :dsaw, note: :e2, release: 8, cutoff: 100
end

Play around with the different wave forms by changing the wave: opt to 0 for saw, 1 for square, 2 for triangle, and 3 for sine. See how different waves sound with different phase: opts, too. Each wave can be inverted vertically using the invertwave: opt. The control wave can also be started at different points with the phaseoffset: opt – a value between 0 and 1. By playing with phase:, wave:, invertwave:, and phaseoffset opts, you can dramatically change how the amplitude is modified through time.
By default, :slicer switches between amplitude values 1 (fully loud) and 0 (silent). This can be altered with the ampmin: and ampmax: opts. Use this with the sine wave setting to create a simple tremolo effect:
with_fx :slicer, amp_min: 0.25, amp_max: 0.75,
wave: 3, phase: 0.25 do
 synth :saw, release: 8
end
This is like moving your hi-fi’s volume knob up and down just a little so the sound ‘wobbles’ in and out.
One of :slicer’s powerful features is its ability to use probability to choose whether or not to turn the slicer on or off. Before the :slicer FX starts a new phase, it rolls a dice and, based on the result, either uses the selected control wave or keeps the amplitude off. Let’s take a listen:
with_fx :slicer, phase: 0.125, probability: 0.6 do
 synth :tb303, note: :e1, cutoff_attack: 8, release: 8
 synth :tb303, note: :e2, cutoff_attack: 4, release: 8
 synth :tb303, note: :e3, cutoff_attack: 2, release: 8
end
We now have an interesting rhythm of pulses. Try changing the probability: opt to a different value between 0 and 1. Values closer to 0 will have more space between each sound, due to the likelihood of the sound being triggered being much lower.
Another thing to notice is that the probability system in the FX is just like the randomisation system accessible via fns such as rand and shuffle. They are both completely deterministic. This means that each time you hit Run, you’ll hear exactly the same rhythm of pulses for a given probability. If you would like to change things around, you can use the seed: opt to select a different starting seed. This works exactly the same as userandomseed, but only affects that particular FX.
Finally, you can change the ‘resting’ position of the control wave when the probability test fails, from 0 to any other position, with the prob_pos: opt:
with_fx :slicer, phase: 0.125, probability: 0.6,
prob_pos: 1 do
 synth :tb303, note: :e1, cutoff_attack: 8, release: 8
 synth :tb303, note: :e2, cutoff_attack: 4, release: 8
 synth :tb303, note: :e3, cutoff_attack: 2, release: 8
end
One really fun thing to do is to use :slicer to chop a drum beat in and out:
with_fx :slicer, phase: 0.125 do
 sample :loop_mika
end
This allows us to take any sample and create new rhythmical possibilities, which is a lot of fun. However, one thing to be careful about is to make sure that the tempo of the sample matches the current BPM in Sonic Pi, otherwise the slicing will sound totally off. For example, try swapping :loopmika with the :loopamen sample to hear how bad this can sound when the tempos don’t align.
As we have already seen, changing the default BPM with usebpm will make all the sleep times and synth envelope durations grow or shrink to match the beat. The :slicer FX honours this too, as the phase: opt is actually measured in beats, not seconds. We can therefore fix the issue with :loopamen above by changing the BPM to match the sample:
use_sample_bpm :loop_amen
with_fx :slicer, phase: 0.125 do
 sample :loop_amen
end
Now, let’s apply all these ideas into a final example that only uses the :slicer FX to create an interesting combination. Go ahead, start changing it and make it into your own piece!
live_loop :dark_mist do
 co = (line 70, 130, steps: 8).tick
 with_fx :slicer, probability: 0.7, prob_pos:
1 do
 synth :prophet, note: :e1, release: 8,
cutoff: co
 end
 with_fx :slicer, phase: [0.125, 0.25].choose
do
 sample :guit_em9, rate: 0.5
 end
 sleep 8
end
live_loop :crashing_waves do
 with_fx :slicer, wave: 0, phase: 0.25 do
 sample :loop_mika, rate: 0.5
 end
 sleep 16
end

Russell runs Raspberry Pi Press, which includes The MagPi, Hello World, HackSpace magazine, and book projects. He’s a massive sci-fi bore.
Subscribe to Raspberry Pi Official Magazine
Save up to 37% off the cover price and get a FREE Raspberry Pi Pico 2 W with a subscription to Raspberry Pi Official Magazine.
More articles
A Quick Intro to Python in Raspberry Pi Official Magazine 163
Do you want the convenience of artificial intelligence, without signing all of your data over to the business weirdos of Silicon Valley? Well now you can run your own chatbot GPT locally on Raspberry Pi. Keep your data safe from prying eyes by having it never leave your computer! Readers of a certain age may […]
Read more →
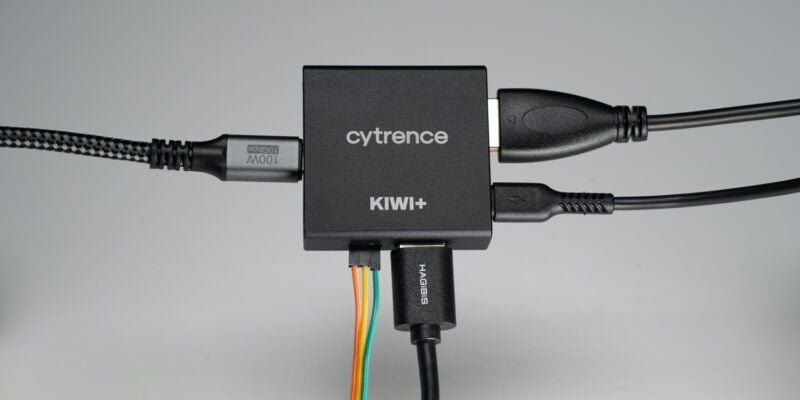
Win 1 of 5 Kiwi+ USB KVMs
About a year ago we reviewed the Kiwi USB KVM and were quite surprised with how well it worked for the price point compared to big name brand capture devices. The team at Cytrence took users (and our) feedback to create the upgraded Kiwi+ with a USB hub that can switch between both devices. We […]
Read more →

Kuensa portable music sequencer
We like the look of where this device is going.
Read more →