Enzo’s Child Activity Board made with Raspberry Pi
By Lucy Hattersley. Posted

Inspired by his young son’s interest in bright lights and buttons, Michael Teeuw decided to build a child-friendly activity board. Nicola King finds out more…

A quick intro to Python – short scripts, rapid results.
What do you do when your toddler keeps pressing all the buttons they can find in the house? As a skilled maker – known for creating the MagicMirror2 framework (magicmirror.builders) – Michael Teeuw opted to create a high-tech activity board based around a Raspberry Pi 3 for his two-year-old son Enzo.
Activity boards can create visual, tactile, and auditory stimulation for young children. Michael had seen other activity boards on the maker scene and, over the period of approximately one year, he built his own version complete with light effects, audio, an eight-digit display, and plenty of buttons and switches.
“Every few weeks I added something new,” recalls Michael. “Enzo was there all along the way. It was fun to see him discover the new additions whenever I added them. You’ll be surprised how quickly a two-year-old picks things up.”
This article first appeared in The MagPi 70. Click here to download your free copy of The MagPi magazine.
Child’s Activity Board built with Raspberry Pi
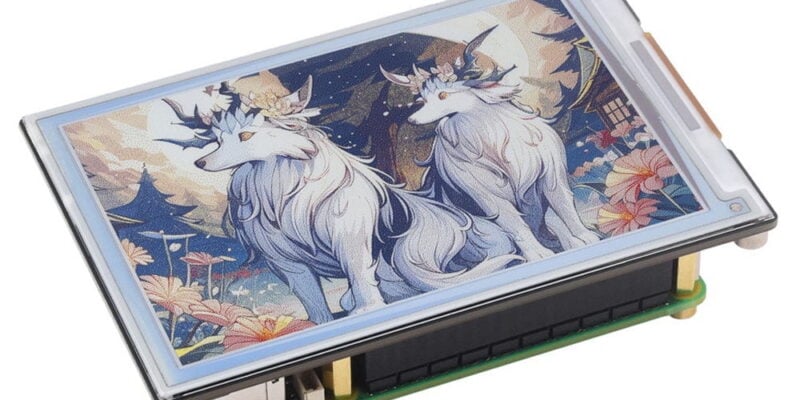
Enzo has already figured out how to turn the rotary encoder knob – lit up impressively by a NeoPixel ring – to switch between his favourite TV cartoon characters shown on the screen. “Every input (buttons, switches, rotary encoder, slider pot) creates a different light effect,” explains Michael. “Combinations of different inputs result in different effects. So for every action, there is something for Enzo to enjoy. It will probably take some time before Enzo has discovered all the combinations.”
Giving Enzo’s Activity Board a classic mission-control look, the eight-digit display acts as a countdown timer which can be started by toggling one of the two main switches. “Whenever it reaches zero, the activity board will self-destruct. But for now, the self-destruction sequence isn’t fully implemented yet!”

Inspiration from the Magic Mirror project
Driven by the Raspberry Pi, the Activity Board’s central display shows a user interface that makes it more than just a box with lights and buttons. “It allows me to add features in the future,” says Michael, “and is an easy way to add sound effects to the project.” Rather than using the Raspberry Pi’s own audio output, he elected to add an Adafruit Speaker Bonnet.
For the UI, the Raspberry Pi runs a default MagicMirror2 installation with a custom module. “This module’s node-helper reads out the serial input and sends it to the MagicMirror front end (which is a web application running on Electron).”
This user interface responds to the input it receives from an Arduino Nano-based control board which handles all the input (buttons, switches etc.) and output (NeoPixel LEDs, digital display).
“The lights and input are all controlled by [the Arduino board], which sends a serial JSON command to the Raspberry Pi whenever there is new input,” reveals Michael. This separation of tasks means that the Activity Board’s light effects can still function without the Raspberry Pi.
Young Enzo helped his father throughout the build process. “His enthusiasm for every update I showed him helped a lot in finishing the project.”
As Enzo gets older, Michael plans to expand the functionality of the board by adding new user interfaces. “Hopefully, one day he’ll be able to add his own UI.”
Michael tells us he is still fine-tuning the software. “Like every piece of code, both the embedded code as well as the MagicMirror2 module contains some bugs. It’s up to Enzo to discover the bugs and send me a bug report.”
Step-01: Bits and pieces
Laying out all the components – buttons, switches, screen, NeoPixels, etc. – on a piece of paper enabled Michael to visualise the final board layout and see how much space was required.

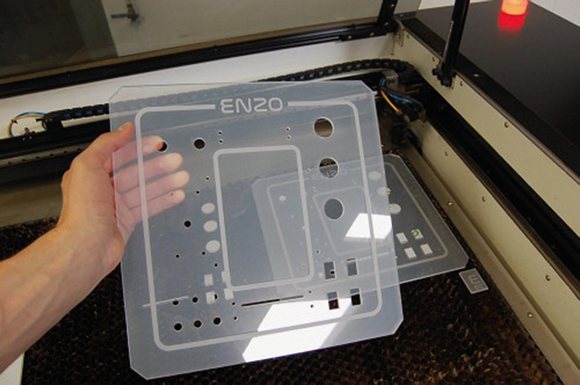
Step-02: Cut the front panel
A transparent panel was required for the front of the Activity Board, so Michael created a bespoke design using the Fusion 360 package, then laser-cut it from a 4 mm acrylic sheet and engraved it.
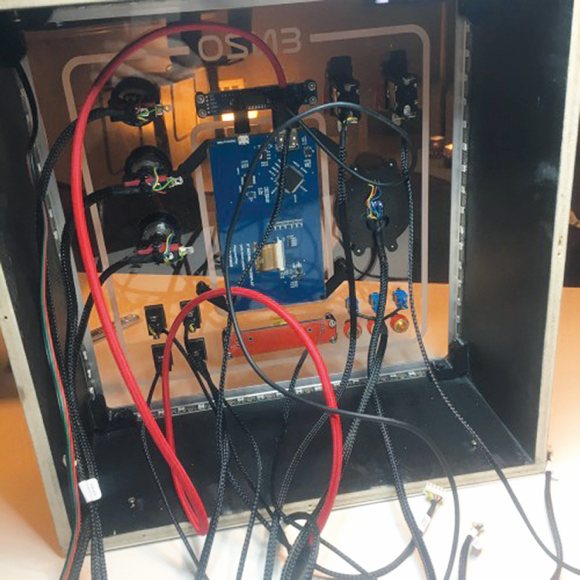
Step-03: Wire it all up
After mounting the front panel on a wooden box, the screen was connected to the Raspberry Pi, while all the inputs were wired to an Arduino Uno-based control board.

Lucy is Editor of Raspberry Pi Official Magazine.
Subscribe to Raspberry Pi Official Magazine
Save up to 37% off the cover price and get a FREE Raspberry Pi Pico 2 W with a subscription to Raspberry Pi Official Magazine.