PiBug 2WD Robot
By Lucy Hattersley. Posted
An easy-to-build, two-wheeled robot that uses the Raspberry Pi as part of its chassis

Make beautiful beats with the complete Raspberry Pi music production toolkit.
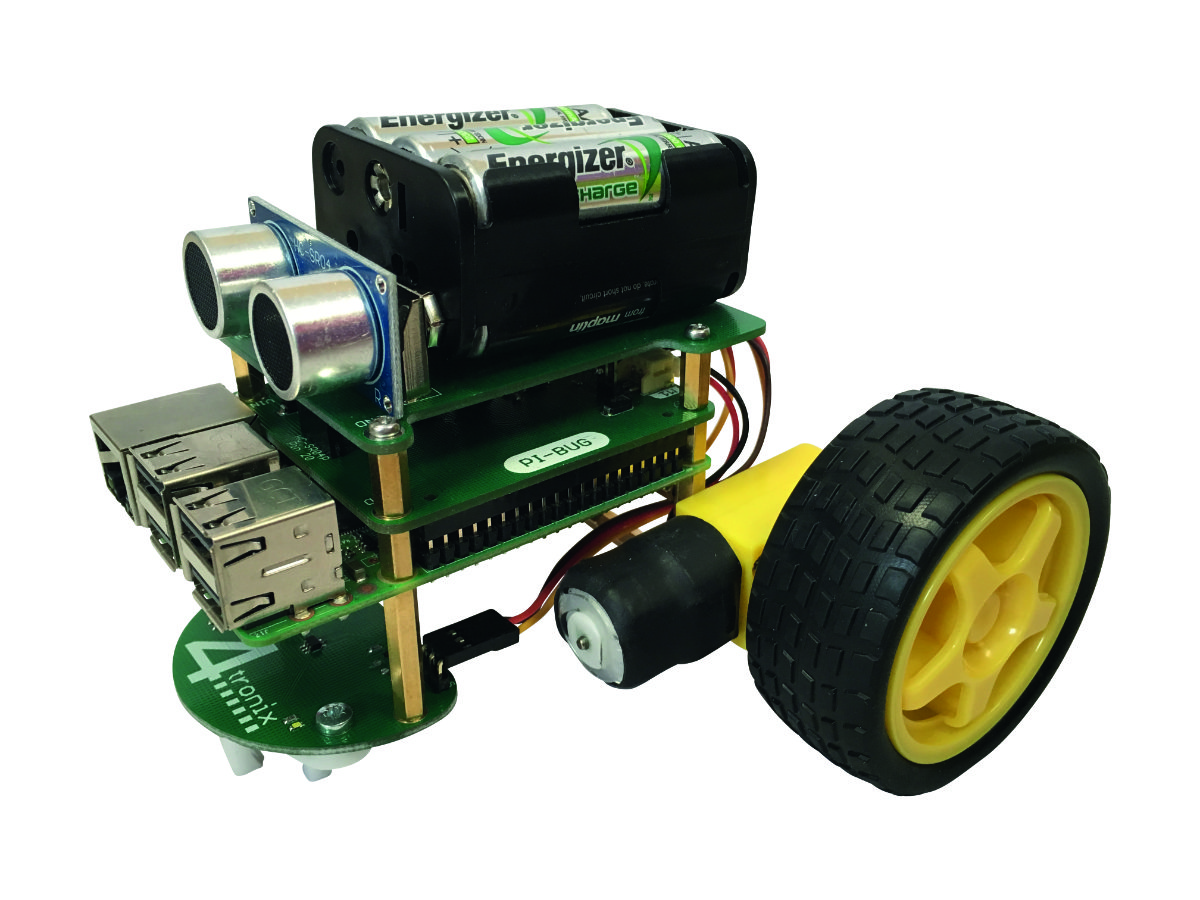
The annual Pi Wars event always inspires more people to get involved in robotics, but where’s the best place to start? Probably an inexpensive, entry-level kit like the PiBug (£24 / $31). What’s really clever about this two-wheeled robot is that your Raspberry Pi is used as a structural component of the robot’s body, so you don’t need to buy or create a separate chassis. This makes the robot much easier and quicker to get up and running, particularly as no soldering is required.
PiBug review: Buggy building
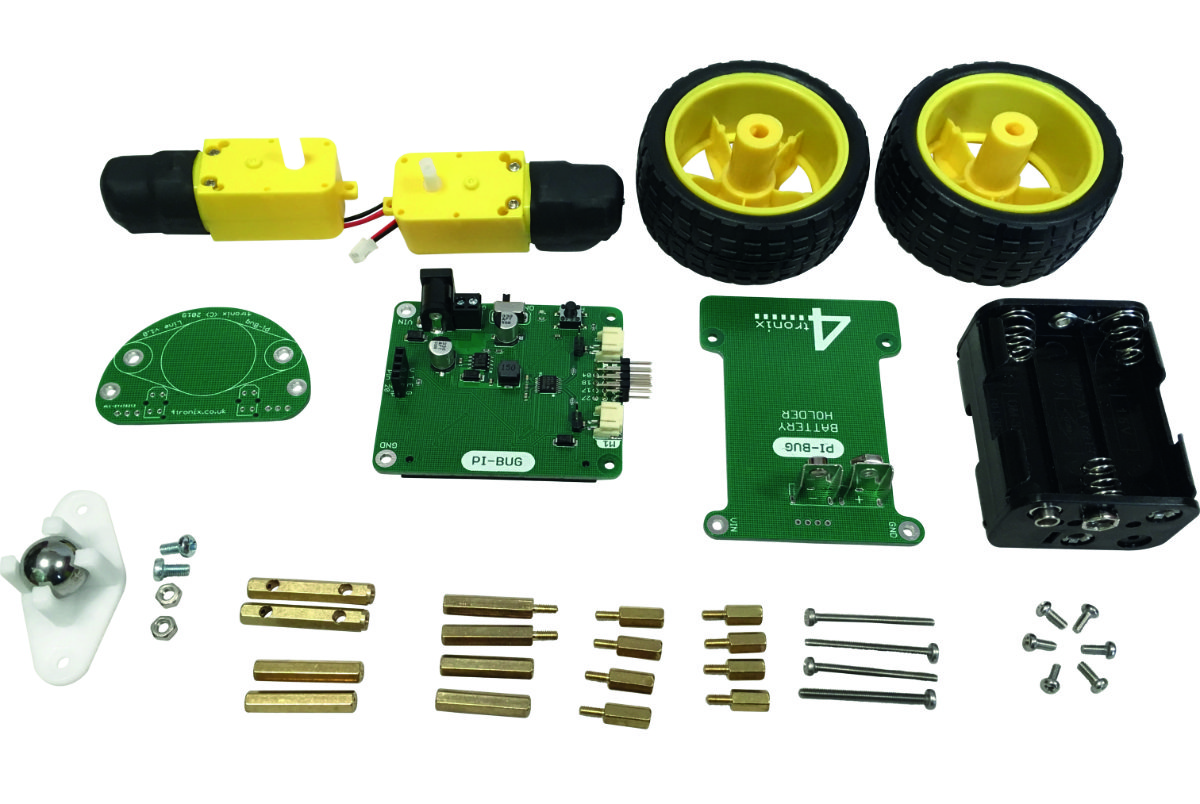
Online step-by-step assembly instructions show how to assemble all the parts to build your PiBug, which should take around 30 minutes.
Screw-together brass hex pillars are used as mounts for the two DC motors, creating a sturdy rectangular framework between them. One thing to note is that the 30 mm vertical pillars have slightly different ends, so you need to check that the rounded ones are on the bottom.
The other pillar ends are connected to two of the Raspberry Pi’s mounting holes using short (9 mm) pillars. The semicircular castor board is then fitted under the front of the Pi, using more pillars. Note that if you want your robot to do line-following, the standard castor board can be replaced with one featuring two line sensors (available separately for £6).
Next, the PiBug motor controller board is slotted onto the Pi’s GPIO header, then secured with more short pillars – onto which the battery holder board is mounted. The robot and Pi are both powered by six AA batteries; rechargeables are recommended.
The final stage involves some simple connections. The motor wires have JST connectors that fit into slots on the motor controller board – much easier than screw terminals. If using line sensors, their female connectors slot onto pins at the rear of the motor controller board; this leaves six spare pins, connected to GPIO pins and power/ground, to use as you wish – along with a push-button on the board. An optional HC-SR04P ultrasonic distance sensor (available for £2.22) is connected via four small holes in the battery board.
PiBug: Quick Specs
- Motors: 2 × DC TT ‘Yellow’ motors, 1:48 ratio, nominally 200 rpm at 6 V, with JST connectors
- Power: 6 × AA batteries (not supplied)
- Optional sensors: Line-follower board (2 × IR sensors), ultrasonic HC‑SR04P
PiBug: In the driving seat
With the PiBug robot assembled and wired, you can start playing with it! A flick of a switch on the side turns on the power to the robot and Raspberry Pi. Once booted up, you can start coding using the PiBug Python library, which comes with a trio of examples to get you started.
As well as code to test the IR line-follower and ultrasonic distance sensors, if fitted, there’s a program that enables you to drive the PiBug around manually via key presses on a remote computer via an SSH connection. The robot is pretty nippy and agile, zipping along at pace and spinning on its two wheels to quickly change direction. Ours didn’t run in a perfectly straight line by default, but you could always alter the library code to calibrate the motors. The PiBug also struggled to set off from a stationary position at the lower speed settings, although it worked fine at a lower speed after slowing down from a faster pace. The low position of the castor board also prevents it navigating major bumps in the terrain.
Still, for an entry-level robot, it works well enough and is a lot of fun. Naturally, you can use the Python library to create your own code to make the PiBug move autonomously, using the optional sensors to avoid obstacles and/or follow lines.
PiBug robot verdict
While it’s a little more expensive than the CamJam EduKit #3, the use of the Raspberry Pi and hex pillars to form a chassis is ingenious and makes for a cool-looking buggy.
8/10

Lucy is Editor of Raspberry Pi Official Magazine.
Subscribe to Raspberry Pi Official Magazine
Save up to 37% off the cover price and get a FREE Raspberry Pi Pico 2 W with a subscription to Raspberry Pi Official Magazine.
More articles
Sequino clock
This tricky build was inspired by a child’s t-shirt
Read more →
Use a robot to build a robot
This glorious, (mostly) 3D printed robot has six degrees of freedom.
Read more →
Make Music With Raspberry Pi in Official Raspberry Pi Magazine issue 166
Music production is an esoteric world of chin stroking and arguing over what kind of valve makes the best sound in a guitar amplifier – at least, it can be. Load up on software, bring your friends, and record your latest masterpiece on Raspberry Pi. We bring news from the world of 3D printing, where […]
Read more →