Raspberry Pi Pico with MicroPython: a quick-start guide
By Ben Everard. Posted
This article was originally published as part of HackSpace magazine, which has since been incorporated into Raspberry Pi Official Magazine.

There are currently two ways of programming your Pico: MicroPython and C/C++. Let’s take a look at MicroPython here as it’s the quickest and easiest way to get started. If you'd rather get started with C, take a look at rptl.io/rp2040.
Program a robot arm, with Raspberry Pi and Python code
First, you need to set your Pico up with the firmware. Head to rptl.io/pico and download a UF2 file with the latest version of the firmware (in the MicroPython tab click on Download UF2 file). Then, unplug your Pico (if it’s already plugged in), press the BootSel button, plug it in to your computer, and release the button. You should now see Pico appear as a USB mass storage device. Drag and drop the UF2 file onto the device and it will disappear. Your Pico is now running MicroPython. You can repeat this process to get MicroPython back if you program it with different firmware (or a C/C++ program).
As well as your Pico, you need a little bit of software on your computer. You can use whatever text editor and serial monitor you like, but for ease of use we recommend Thonny, at least for getting started. You can download this from thonny.org. It’s available for most major platforms including Windows, macOS, Linux, and Raspberry Pi.
Once Thonny is installed, open it. You need to tell it how to connect to your Pico, so go to Run > Select Interpreter. You should pick ‘MicroPython (RaspberryPi Pico)’ in the first box. If this isn’t available, then you’re using an older version of Thonny – if possible, you should update this, but if not, you can use ‘MicroPython (Generic)’. After selecting the version, you need to select the serial port your Pico’s connected to. Depending on what else you have connected to your computer, you may only have one option there. If there’s more than one, it may take a little trial and error to find the right one. You can always unplug Pico to see which port disappears from the list, then plug it back in. When it’s connected properly, you’ll see something like the following in the Shell section of the main interface:
MicroPython v1.13 on 2020-10-14; Raspberry Pi Pico with cortex-m0plus

There are two different ways of running MicroPython code. You can type it in the interpreter (at the bottom of the window where lines start with >>>). Here, each line is executed as soon as you press enter. For example, if you enter print("hello world"), you’ll immediately see ‘hello world’ come back. The other is in the text editor. Here, you write a script and, when you’re ready, you run the whole script in one go. For example, enter print("hello world") here and nothing should happen. If you press the green arrow in the toolbar (or F5 on your keyboard), you’ll be prompted to save the file (this author prefers to save them on his computer rather than the Pico as it’s easier to keep track of them there), then you’ll see the following in the interpreter:
>>> %Run -c $EDITOR_CONTENT
hello world
Interactive mode is great for quickly trying something out when you don’t know the exact syntax or how to do something.
Now we’ve got our development environment set up and running, let’s try a simple program. As is traditional with microcontrollers, let’s make the LED flash on and off.
import machine
import time

pin = machine.Pin(25, machine.Pin.OUT)

while True:
    pin.value(1)
    time.sleep(1)
    pin.value(0)
    time.sleep(1)
This will continue to run forever unless you press ctrl+C to stop it.

If you’re unfamiliar with Python, one of its more unusual features is that whitespace is important, so you need to have a consistent indent for the lines after while True:. This program first imports a pair of modules that it’ll need: machine brings in the important bits for accessing the underlying hardware, and time brings in the sleep method that we need to pause the loop.
First, we have to set the function of the pin; here, machine.Pin.OUT has set it to output. If we wanted to read values in, we could use machine.Pin.IN. You can also set more advanced functions such as pull‑ups here.
That’s the basics of running MicroPython on Pico. If you’re familiar with Python or MicroPython already, then you may be happy to dive right in and start programming. You can find the core docs at docs.micropython.org/en/latest.
If you’re new to this programming language, then you can get the brand new book Get Started with MicroPython on Raspberry Pi Pico. Buy it online or download it for free from hsmag.cc/MPBook.
You can get a free Raspberry Pi Pico by subscribing to HackSpace magazine from just £5.

Ben is the Editor of HackSpace magazine. When not wrangling words, he enjoys cycling, gardening, and attempting to identify wild mushrooms.
Subscribe to Raspberry Pi Official Magazine
Save up to 37% off the cover price and get a FREE Raspberry Pi Pico 2 W with a subscription to Raspberry Pi Official Magazine.
More articles

Cyberdeck
We can’t imagine the looks you’d get using this machine on your daily commute, but apparently the maker of this wonderful machine does just that.
Read more →

Programming station
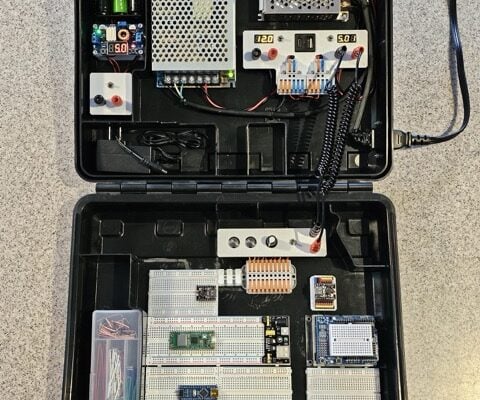
Spot the microcontroller: we can see an Arduino Uno, Arduino Nano, a pair of ESP32 boards, and a Raspberry Pi Pico, all waiting to be played with.
Read more →

Solder fume extractor
This device has adjustable fan speeds and light levels, courtesy of Raspberry Pi Pico.
Read more →
