Tracking Telescope Mount
By Russell Barnes. Posted

For Mike Hamende, making something is far more exciting and rewarding than logging into an online store, as his Pi-powered tracking telescope mount proves

If you search for Mike Hamende’s user name ‘8PumpkinDonuts’ online, you’ll soon realise that he’s quite the craftsman. From a suspended lounger for his fiancée, to a wristwatch built completely from scratch, Mike is a true maker. So it’s really no surprise that he’d eventually build a Raspberry Pi project that we could sink our teeth into. Despite his lack of previous Python knowledge, and ignoring the fact he could easily purchase what he’d decided to build, Mike produced a tracking telescope mount for his 8˝ Orion reflector.
The full article can be found in The MagPi 55 and was written by Alex Bate.
“This is definitely the most involved project I’ve ever completed,” Mike tells us. “I’m aware there are mounts I could have bought to accomplish the same thing, but, while astronomy is a hobby of mine, building things is what I’m really into.”
Mike used two Nema 17 stepper motors, powered by a Raspberry Pi 3, to angle the mount. For the frame, he used 3×3˝ T-slot aluminium, utilising his CNC mill, CNC router, and CNC lathe to cut further pieces of aluminium for the mount.
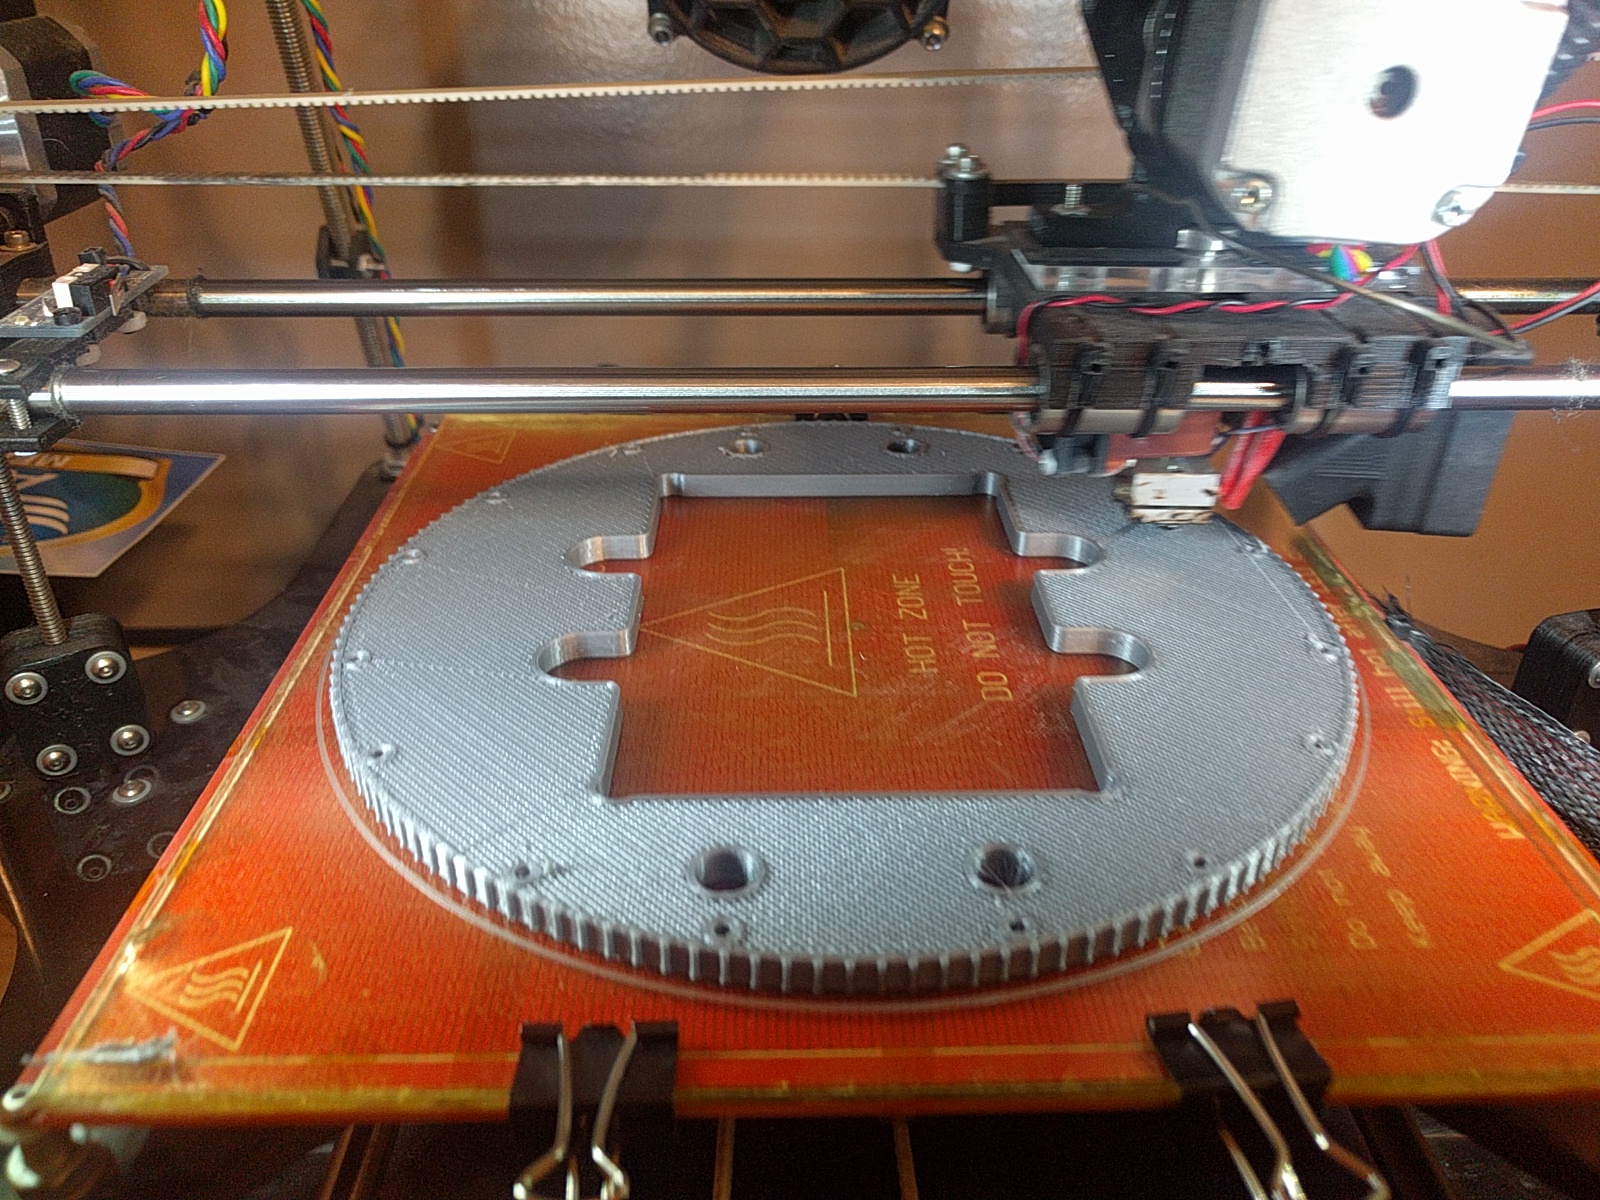
Two turntables with 60mm thrust ball bearings act as the basis for the motion mechanics, cut from 1/2˝ thick aluminium. Mike then had to build his own drive pulleys using 3D-printed parts and fibreglass flanges. He amended technical documents he’d found online, removing teeth, until the pulley fitted perfectly within the build. From here, he also went on to print, rout, and fit all the pieces needed for the mount and frame before turning to a less-familiar subject: the Raspberry Pi.
Mike originally created a script that would position the telescope to align with celestial objects by way of information from the US Naval Observatory. However, upon completing the code, he discovered PyEphem, a Python package that offered a much larger scope for celestial exploration. Though he had the PyEphem code, he couldn’t find anything to control the stepper motors and linear acceleration, so he was still faced with the challenge of quickly learning enough Python to see him through.

Once he’d cleared up his prototype breadboard and soldered the boards into place, Mike fitted the Pi with a touchscreen. The screen enables him to select one of 800 preset targets for the telescope to focus on. If he wants to view any other object, he simply uses a small wireless keyboard to enter the chosen coordinates manually.
Mike went to school to study mechanical engineering, though he attributes much of his skill to being a hobbyist. “My hobby is making things and I’ve been doing it since I was old enough to hold a screwdriver.” He even converted his home lathe and router to be CNC, and built his own 3D printer too.

Russell runs Raspberry Pi Press, which includes The MagPi, Hello World, HackSpace magazine, and book projects. He’s a massive sci-fi bore.
Subscribe to Raspberry Pi Official Magazine
Save up to 37% off the cover price and get a FREE Raspberry Pi Pico 2 W with a subscription to Raspberry Pi Official Magazine.
More articles

Make a Smart Home in Raspberry Pi Official Magazine issue 167
The dream of smart, connected devices controlling your home automatically, is especialy appealing on a lazy day when we’re trying to get work done in a heatwave. Maybe this will be the year we finally integrate temperature sensors with fans and a drinks dispenser to keep us cool, or maybe not, but we do know […]
Read more →
Win 1 of 3 Pironman 5 Pro Max cases!
Transform your Raspberry Pi with this amazing case
Read more →

Learning to code in an AI age
A new Raspberry Pi Foundation course helps young people learn to code.
Read more →