How to install TensorFlow on Raspberry Pi
By Rob Zwetsloot. Posted
Google TensorFlow 1.9 officially available for Raspberry Pi. Discover how to install TensorFlow framework to learn AI techniques and add AI to your future projects
Make beautiful beats with the complete Raspberry Pi music production toolkit.
Google TensorFlow 1.9 officially supports the Raspberry Pi, making it possible to quickly install TensorFlow and start learning AI techniques with a Raspberry Pi.
Back in The MagPi issue 71 we noted that it was getting easier to install TensorFlow on a Raspberry Pi. This latest news makes installing TensorFlow 1.9 as simple as using pip.
Pete Warden, a Software Engineer at Google writes
Thanks to a collaboration with the Raspberry Pi Foundation, we’re now happy to say that the latest 1.9 release of TensorFlow can be installed from pre-built binaries using Python’s pip package system!
How to Install TensorFlow on a Raspberry Pi
Open a Terminal window and enter:
sudo apt install libatlas-base-dev
pip3 install tensorflow
What is Google Tensorflow
Google TensorFlow is a powerful open-source software framework used to power AI projects around the globe.
TensorFlow is used for machine learning and the creation of neural networks. These make it possible for computers to perform increasingly complex tasks, such as image recognition and text analysis.
When it comes to AI, most people think of powerful supercomputers crunching billions of numbers in giant databanks. But there are two parts to machine learning. There is a train/test part, where you use a lot of data to build a model. And there’s deployment, where you take a model and use it as part of a project. And that’s where the Raspberry Pi fits in.
Although Raspberry Pi isn’t officially supported by Google, there are example models included for the Raspberry Pi and it can be fun to get TensorFlow up and running on a Pi. And there are lots of interesting community projects around that put TensorFlow to good use.
Using TensorFlow can give you a good understanding of how AI works, and how to put AI to practical use in your projects.

Write Hello World in TensorFlow
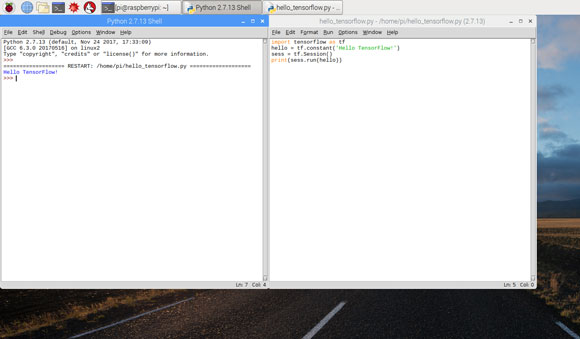
Hopefully, you now have TensorFlow up and running. So let’s start it up. Open Python 3 (IDLE) using Menu > Programming > Python 3 (IDLE). Choose File > New File and enter the hello_tensorflow.py code:
import tensorflow as tf
hello = tf.constant('Hello, TensorFlow!')
sess = tf.Session()
print(sess.run(hello))
Save the code file as hello_tensorflow.py and Choose Run > Run Module. You will get a warning because TensorFlow is compiled for Python 3.4 and we’re running Python 3.5. Don’t worry, the code works. The Python shell will display:
Hello, TensorFlow!
TensorFlow example code
Google has a bunch of models developed for Raspberry Pi that you can test out. Start by cloning the TensorFlow repository:
git clone https://github.com/tensorflow/tensorflow.gitFollow the instructions here to build the example models.
Now head to the part of the TensorFlow repository to find Google example models and instructions.
The default example is a picture of Grace Hopper. Run it and you will see that it identifies a ‘military uniform’, ‘suit’, and ‘academic gown’ (and then other items in order of decreasing probability). From here you can see how this model could be used to identify objects in your own images, and use that in your own code. There is also a link to an example that uses the Pi Camera Module directly.

Community help with TensorFlow
Now you have everything you need to start using TensorFlow. It’s a big subject and there’s far more to it than we could outline in this tutorial (or even this entire magazine). Learn by doing and follow some TensorFlow projects. Start with Sarthak Jain’s ‘How to easily detect objects with deep learning on Raspberry Pi’ or Alasdair Allan’s ‘Magic mirror with TensorFlow’.
Build TensorFlow from wheel
You can try to build TensorFlow using the wheel file. In a Terminal, enter:
sudo pip3 install --upgrade https://storage.googleapis.com/tensorflow/linux/cpu/tensorflow-1.8.0-cp34-cp34m-linux_x86_64.whlAlternatively, you can use a nightly wheel built for Raspberry Pi, which is available from magpi.cc/xKLBzu. Download the wheel file and run it, like this:
sudo pip3 install --upgrade tensorflow-1.9.0rc0-cp34-none-linux_armv7l.whlTake a look at TensorFlow’s Install Sources page or Common Installation Problems page.

Rob is amazing. He’s also the Features Editor of Raspberry Pi Official Magazine, a hobbyist maker, cosplayer, comic book writer, and extremely modest.
Subscribe to Raspberry Pi Official Magazine
Save up to 37% off the cover price and get a FREE Raspberry Pi Pico 2 W with a subscription to Raspberry Pi Official Magazine.
More articles

Learning to code in an AI age
A new Raspberry Pi Foundation course helps young people learn to code.
Read more →
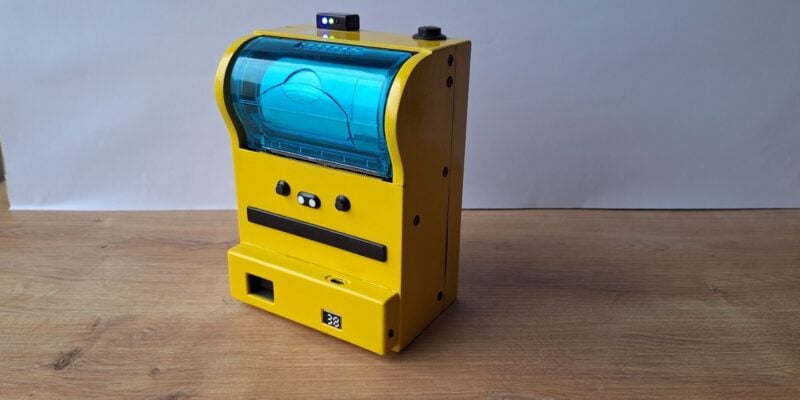
Poor man’s Polaroid camera
There’s something really big and chunky about this build that we find reassuring
Read more →

Raspberrarium terrarium
Control the seasons and phases of the moon with your own tiny ecosystem
Read more →